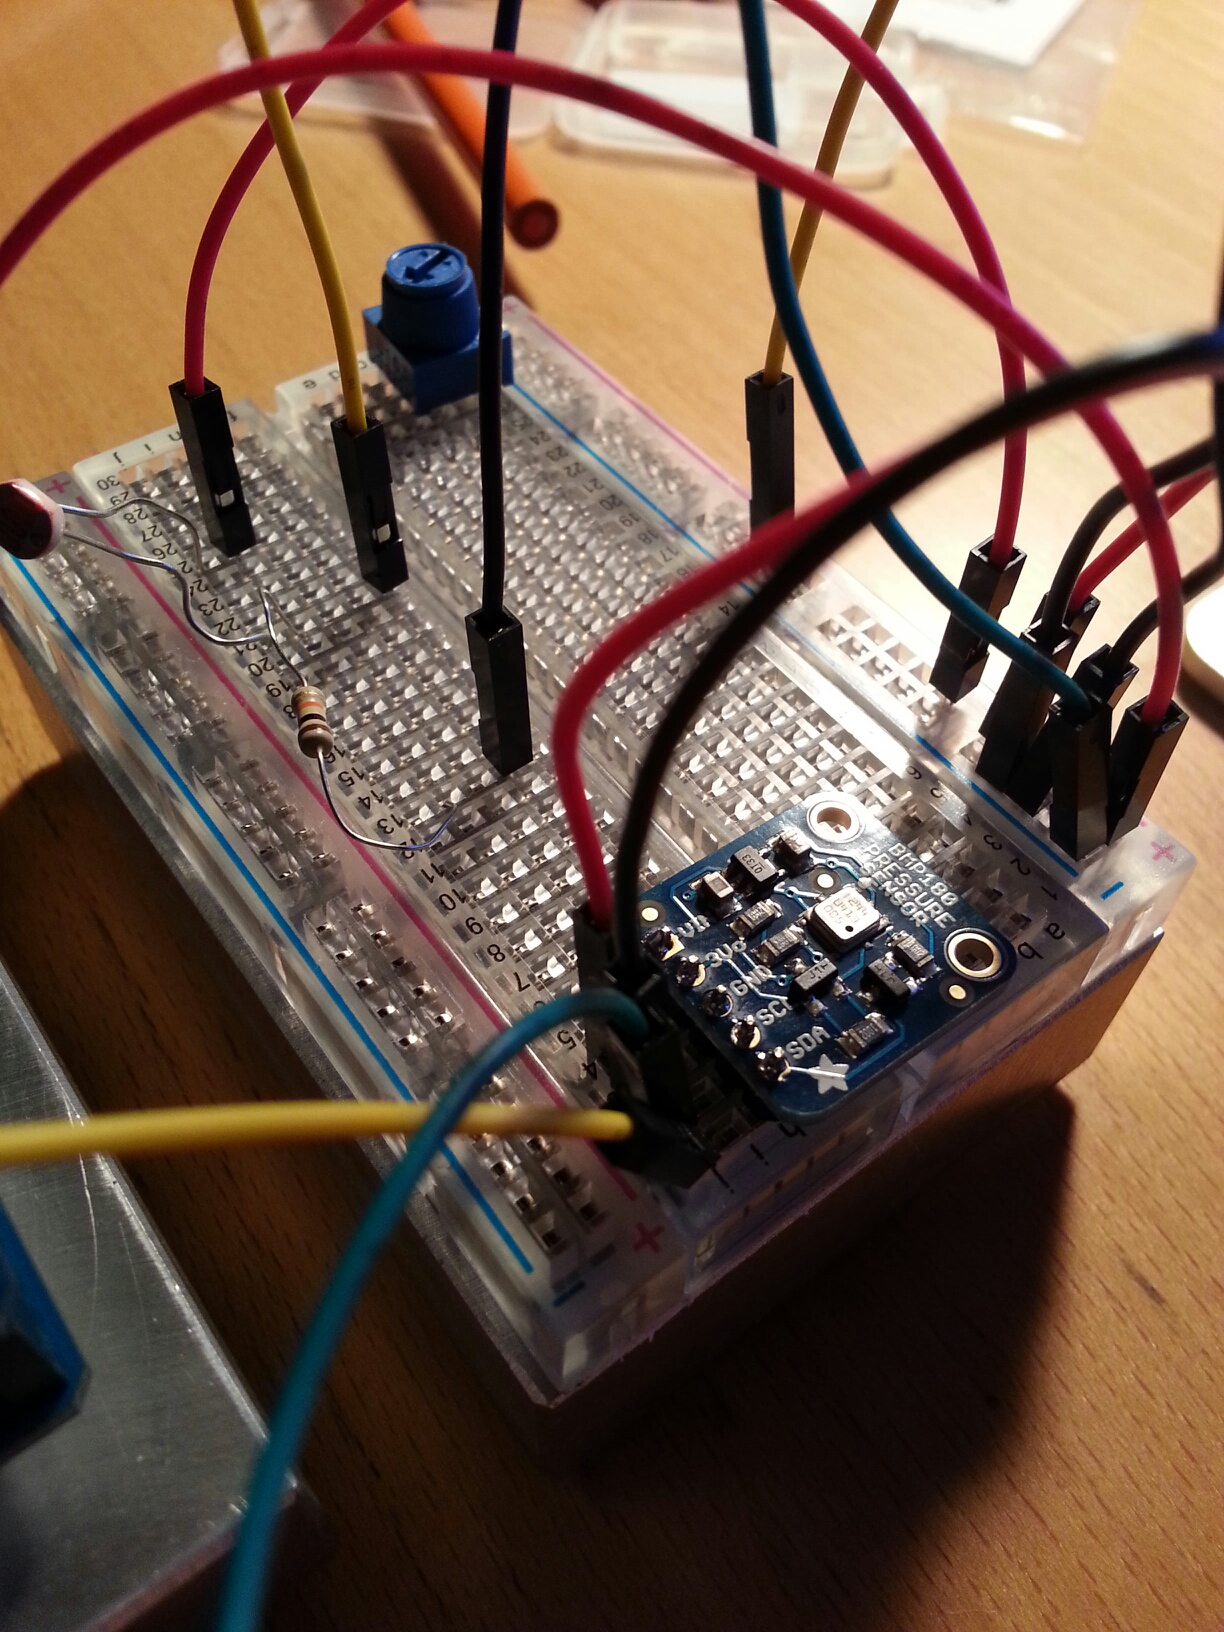
Current code (needs some clean up but working) for the weather station that post to both Xively and ThingSpeak.
ThingSpeak Weather Channel Xively Weather Station
[pre lang="C" wrapline="false"]
// Includes
#include <Dhcp.h>
#include <Dns.h>
#include <Ethernet.h>
#include <EthernetClient.h>
#include <EthernetServer.h>
#include <EthernetUdp.h>
#include <ThingSpeak.h>
#include <Xively.h>
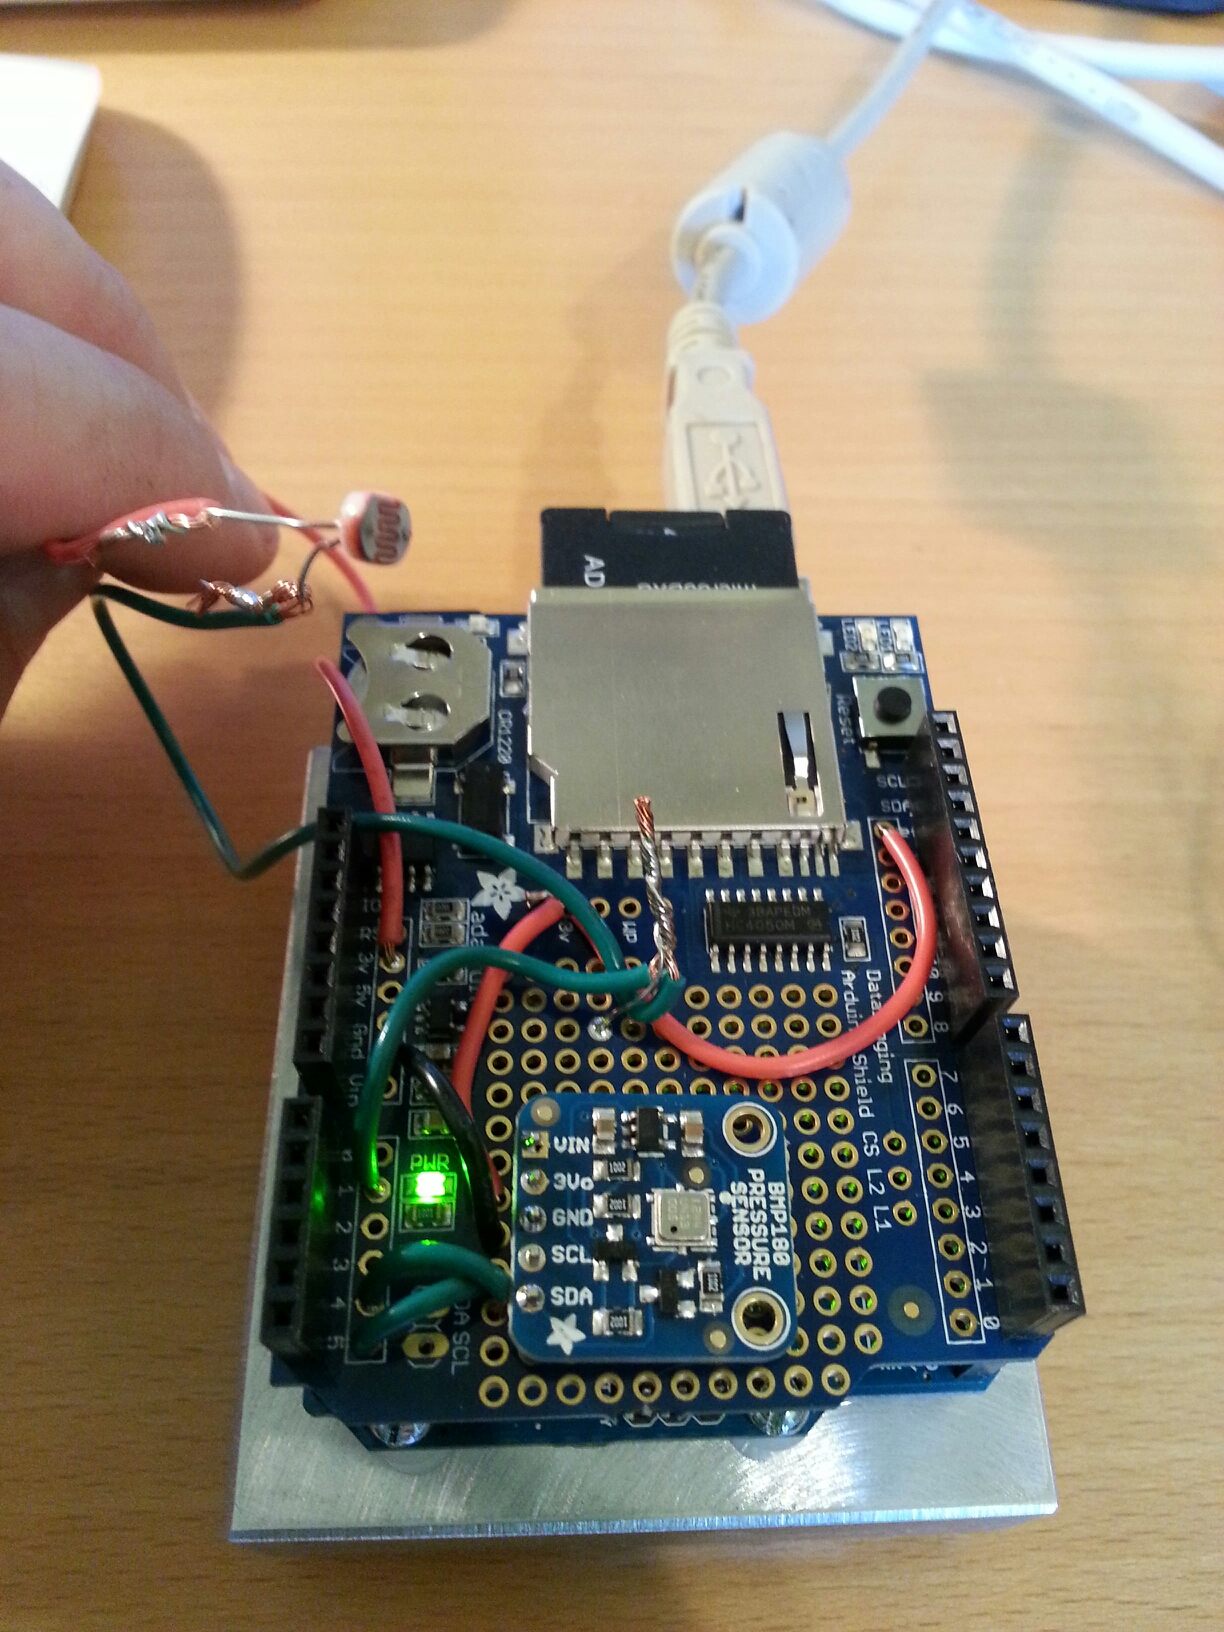
#include <Wire.h>
#include <Adafruit_Sensor.h>
#include <Adafruit_TSL2561_U.h>
#include <Adafruit_BMP085_U.h>
// Setup TSL2561 and BMP085 Sensors
Adafruit_TSL2561_Unified tsl = Adafruit_TSL2561_Unified(TSL2561_ADDR_FLOAT, 12345);
Adafruit_BMP085_Unified bmp = Adafruit_BMP085_Unified(10085);
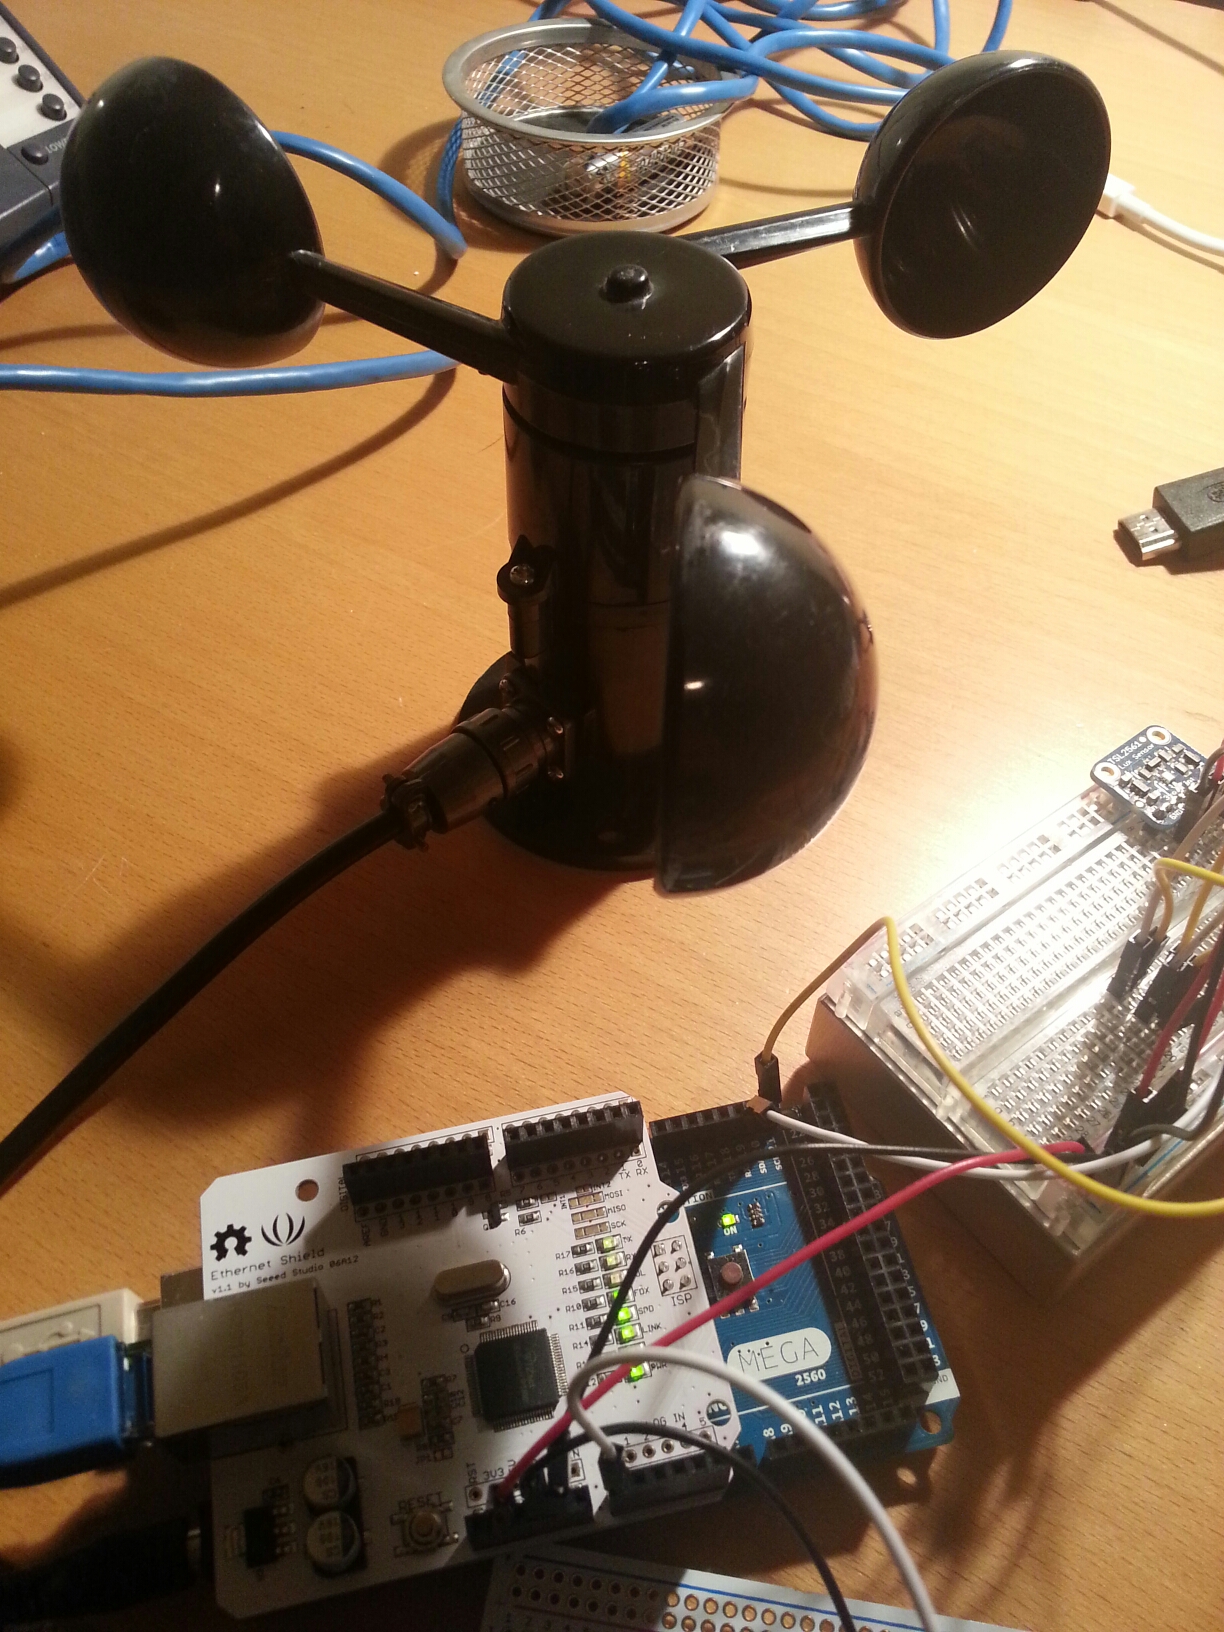
// MAC address for your Ethernet shield
byte mac[] = { 0xDE, 0xAA, 0xBB, 0xCC, 0xDE, 0x02 };
//Uploading Data to two different services for comparisons
// Your Xively key to let you upload data
char xivelyKey[] = "YOURKEYHERE";
// ThingSpeak
unsigned long myChannelNumber = 000000;
const char * myWriteAPIKey = "YOURKEYHERE";
// Define the strings for our datastream IDs for Xively
char tempID[] = "Temp";
char lightID[] = "Light";
char bpID[] = "Barometric_Pressure";
char wsID[] = "Wind_Speed";
//Setting up Windspeed
//Thanks Allison Lassiter - hackerscapes.com for help with anemometer code
int sensorPin = A0;
int sensorValue = 0;
float voltageConversionConstant = .0048828125;
float windSpeed = 0;
float sensorVoltage = 0;
float voltageMin = .4; // Mininum output voltage from anemometer in V.
float windSpeedMin = 0; // Wind speed in meters/sec corresponding to minimum voltage
float voltageMax = 2.0; // Maximum output voltage from anemometer in V.
float windSpeedMax = 32; // Wind speed in meters/sec corresponding to maximum voltage
//Data structure for Xively data upload
//Basically one for each sensor
XivelyDatastream datastreams[] = {
XivelyDatastream(tempID, strlen(tempID), DATASTREAM_FLOAT),
XivelyDatastream(lightID, strlen(lightID), DATASTREAM_FLOAT),
XivelyDatastream(bpID, strlen(bpID), DATASTREAM_FLOAT),
XivelyDatastream(wsID, strlen(wsID), DATASTREAM_FLOAT)
};
// Finally, wrap the datastreams into a feed
XivelyFeed feed(00000000, datastreams, 4 /* number of datastreams */);
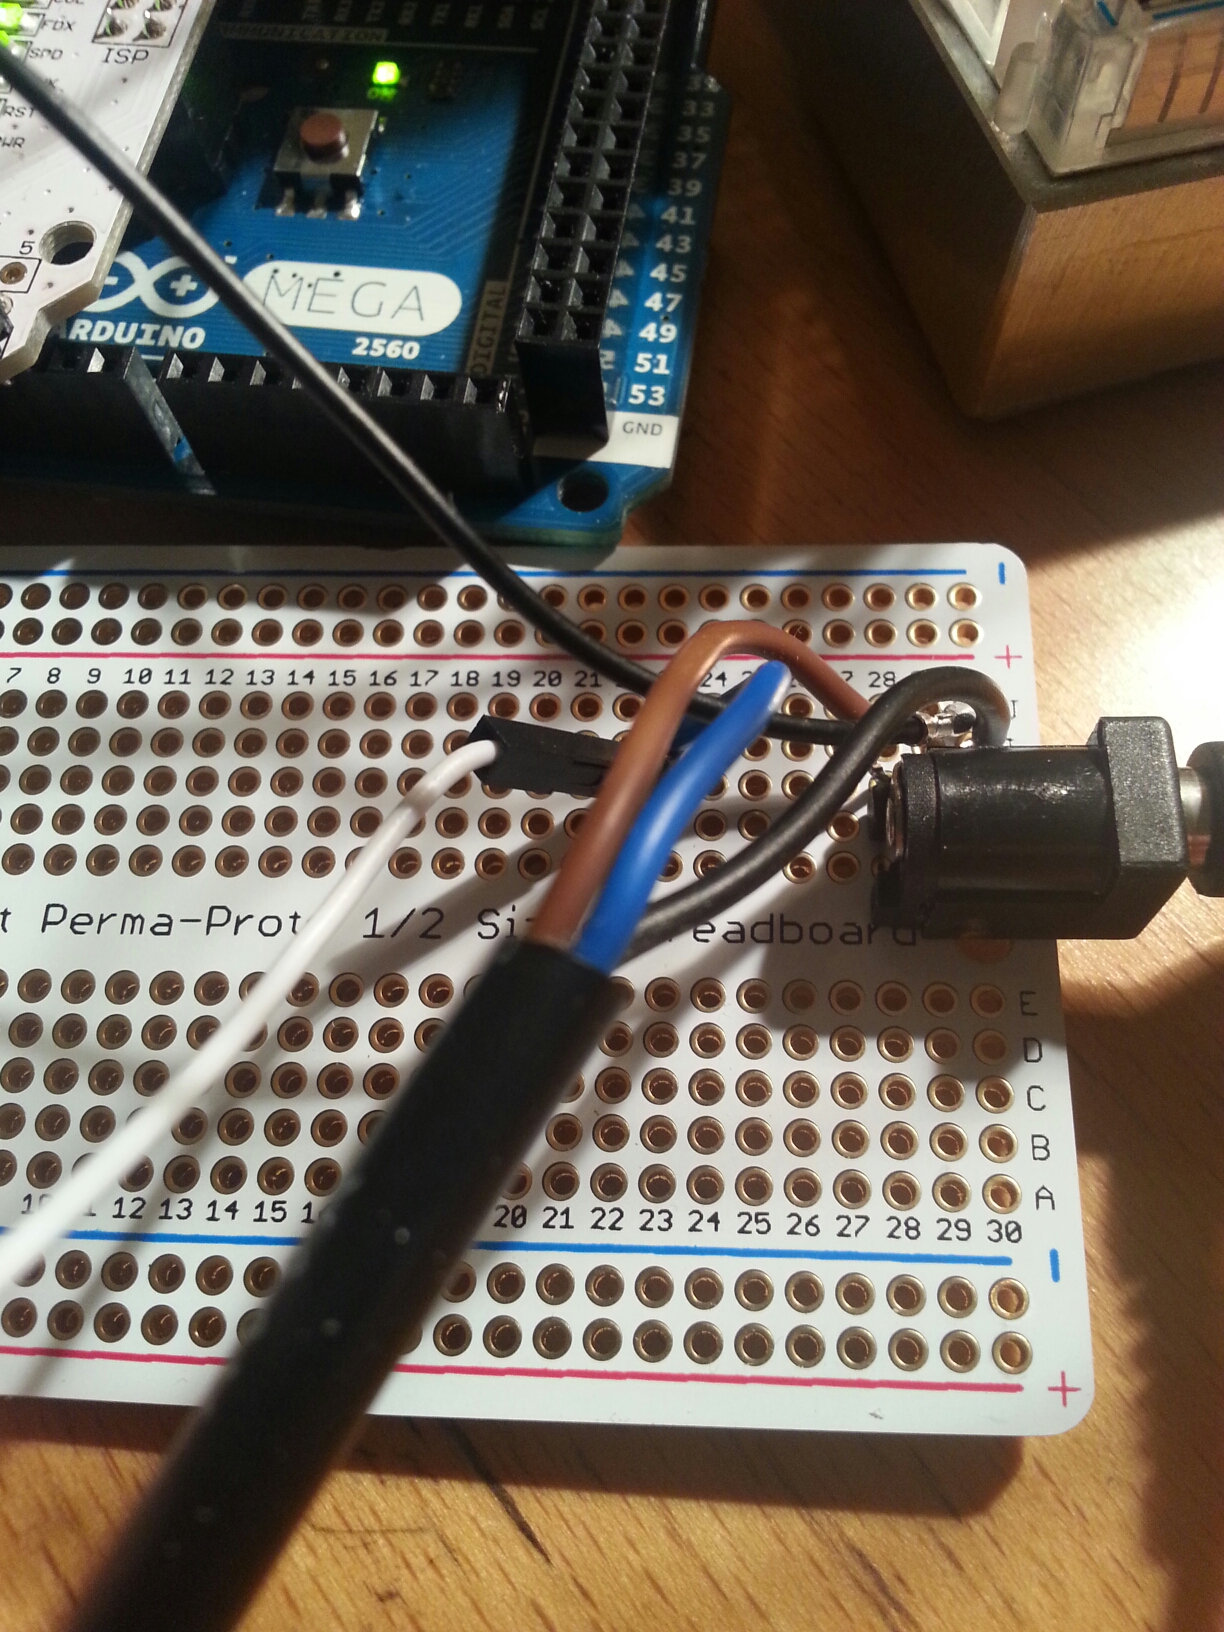
//Setup Ethernet Client
EthernetClient client;
//Setup Xively client
XivelyClient xivelyclient(client);
/**************************************************************************/
/*
Displays some basic information on this sensor from the unified
sensor API sensor_t type (see Adafruit_Sensor for more information)
*/
/**************************************************************************/
void displaySensorDetails(void)
{
sensor_t sensor;
tsl.getSensor(&sensor);
Serial.println("------------------------------------");
Serial.print ("Sensor: "); Serial.println(sensor.name);
Serial.print ("Driver Ver: "); Serial.println(sensor.version);
Serial.print ("Unique ID: "); Serial.println(sensor.sensor_id);
Serial.print ("Max Value: "); Serial.print(sensor.max_value); Serial.println(" lux");
Serial.print ("Min Value: "); Serial.print(sensor.min_value); Serial.println(" lux");
Serial.print ("Resolution: "); Serial.print(sensor.resolution); Serial.println(" lux");
Serial.println("------------------------------------");
Serial.println("");
delay(500);
}
void displayBMPSensorDetails(void)
{
sensor_t sensor;
bmp.getSensor(&sensor);
Serial.println("------------------------------------");
Serial.print ("Sensor: "); Serial.println(sensor.name);
Serial.print ("Driver Ver: "); Serial.println(sensor.version);
Serial.print ("Unique ID: "); Serial.println(sensor.sensor_id);
Serial.print ("Max Value: "); Serial.print(sensor.max_value); Serial.println(" hPa");
Serial.print ("Min Value: "); Serial.print(sensor.min_value); Serial.println(" hPa");
Serial.print ("Resolution: "); Serial.print(sensor.resolution); Serial.println(" hPa");
Serial.println("------------------------------------");
Serial.println("");
delay(500);
}
/**************************************************************************/
/*
Configures the gain and integration time for the TSL2561
*/
/**************************************************************************/
void configureSensor(void)
{
/* You can also manually set the gain or enable auto-gain support */
// tsl.setGain(TSL2561_GAIN_1X); /* No gain ... use in bright light to avoid sensor saturation */
// tsl.setGain(TSL2561_GAIN_16X); /* 16x gain ... use in low light to boost sensitivity */
tsl.enableAutoRange(true); /* Auto-gain ... switches automatically between 1x and 16x */
/* Changing the integration time gives you better sensor resolution (402ms = 16-bit data) */
tsl.setIntegrationTime(TSL2561_INTEGRATIONTIME_13MS); /* fast but low resolution */
// tsl.setIntegrationTime(TSL2561_INTEGRATIONTIME_101MS); /* medium resolution and speed */
// tsl.setIntegrationTime(TSL2561_INTEGRATIONTIME_402MS); /* 16-bit data but slowest conversions */
/* Update these values depending on what you've set above! */
Serial.println("------------------------------------");
Serial.print ("Gain: "); Serial.println("Auto");
Serial.print ("Timing: "); Serial.println("13 ms");
Serial.println("------------------------------------");
}
/**************************************************************************/
/*
Arduino setup function (automatically called at startup)
*/
/**************************************************************************/
void setup(void)
{
Serial.begin(9600);
Serial.println("Light Sensor Test"); Serial.println("");
// Setup Ethernet
while (Ethernet.begin(mac) != 1)
{
Serial.println("Error getting IP address via DHCP, trying again...");
delay(5000);
}
// print your local IP address:
Serial.print("My IP address: ");
for (byte thisByte = 0; thisByte < 4; thisByte++) {
// print the value of each byte of the IP address:
Serial.print(Ethernet.localIP()[thisByte], DEC);
Serial.print(".");
}
/* Initialise the BMP sensor */
if(!bmp.begin())
{
/* There was a problem detecting the BMP085 ... check your connections */
Serial.print("Ooops, no BMP085 detected ... Check your wiring or I2C ADDR!");
while(1);
}
/* Display some basic information on this sensor */
Serial.println("Found BMP");
displayBMPSensorDetails();
/* Initialise the TSL sensor */
if(!tsl.begin())
{
/* There was a problem detecting the ADXL345 ... check your connections */
Serial.print("Ooops, no TSL2561 detected ... Check your wiring or I2C ADDR!");
while(1);
}
/* Display some basic information on this sensor */
displaySensorDetails();
/* Setup the sensor gain and integration time */
//configureSensor();
//Setup Thingspeak client
ThingSpeak.begin(client);
/* We're ready to go! */
Serial.println("");
}
/**************************************************************************/
/*
Arduino loop function, called once 'setup' is complete (your own code
should go here)
*/
/**************************************************************************/
void loop(void)
{
/* Get a new sensor event */
sensors_event_t event;
sensors_event_t tslevent;
tsl.getEvent(&tslevent);
bmp.getEvent(&event);
/* Display the results (light is measured in lux) */
if (tslevent.light)
{
Serial.print(tslevent.light); Serial.println(" lux");
//Add Light reading to Xively datastream and ThingSpeak
datastreams[1].setFloat(tslevent.light);
ThingSpeak.setField(3,tslevent.light);
}
else
{
/* If event.light = 0 lux the sensor is probably saturated
and no reliable data could be generated! */
Serial.println("Sensor overload");
}
/* Display the results (barometric pressure is measure in hPa) */
if (event.pressure)
{
/* Display atmospheric pressue in hPa */
Serial.print("Pressure: ");
Serial.print(event.pressure);
Serial.println(" hPa");
/Add Event Pressure to Xively datastream and ThingSpeak
datastreams[2].setFloat(event.pressure);
ThingSpeak.setField(1,event.pressure);
/* Calculating altitude with reasonable accuracy requires pressure *
* sea level pressure for your position at the moment the data is *
* converted, as well as the ambient temperature in degress *
* celcius. If you don't have these values, a 'generic' value of *
* 1013.25 hPa can be used (defined as SENSORS_PRESSURE_SEALEVELHPA *
* in sensors.h), but this isn't ideal and will give variable *
* results from one day to the next. *
* *
* You can usually find the current SLP value by looking at weather *
* websites or from environmental information centers near any major *
* airport. *
* *
* For example, for Paris, France you can check the current mean *
* pressure and sea level at: http://bit.ly/16Au8ol */
/* First we get the current temperature from the BMP085 */
float temperature;
bmp.getTemperature(&temperature);
datastreams[0].setFloat(temperature);
ThingSpeak.setField(2,temperature);
Serial.print("Temperature: ");
Serial.print(temperature);
Serial.println(" C");
/* Then convert the atmospheric pressure, SLP and temp to altitude */
/* Update this next line with the current SLP for better results */
float seaLevelPressure = SENSORS_PRESSURE_SEALEVELHPA;
Serial.print("Altitude: ");
Serial.print(bmp.pressureToAltitude(seaLevelPressure,
event.pressure,
temperature));
Serial.println(" m");
Serial.println("");
}
else
{
Serial.println("Sensor error");
}
//Read anemometer
sensorValue = analogRead(sensorPin);
sensorVoltage = sensorValue * voltageConversionConstant; //Convert sensor value to actual voltage
Serial.print("Sensor Value: ");
Serial.println(sensorValue);
//Convert voltage value to wind speed using range of max and min voltages and wind speed for the anemometer
if (sensorVoltage <= voltageMin){
windSpeed = 0; //Check if voltage is below minimum value. If so, set wind speed to zero.
//Write to Xively and ThingSpeak
datastreams[3].setFloat(windSpeed);
ThingSpeak.setField(4,windSpeed);
}else {
//Write to Xively and ThingSpeak
windSpeed = (sensorVoltage - voltageMin)*windSpeedMax/(voltageMax - voltageMin); //For voltages above minimum value, use the linear relationship to calculate wind speed.
datastreams[3].setFloat(windSpeed);
ThingSpeak.setField(4,windSpeed);
}
//Add all streams to Xively
Serial.println("Uploading it to Xively");
Serial.println(xivelyKey);
Serial.println(feed);
int ret = xivelyclient.put(feed, xivelyKey);
Serial.print("xivelyclient.put returned ");
Serial.println(ret);
// Update Thingspeak
// Write the fields that you've set all at once.
ThingSpeak.writeFields(myChannelNumber, myWriteAPIKey);
//Print voltage and windspeed to serial
Serial.print("Voltage: ");
Serial.print(sensorVoltage);
Serial.print("\t");
Serial.print("Wind speed: ");
Serial.println(windSpeed);
delay(3000);
}
[/pre]
read more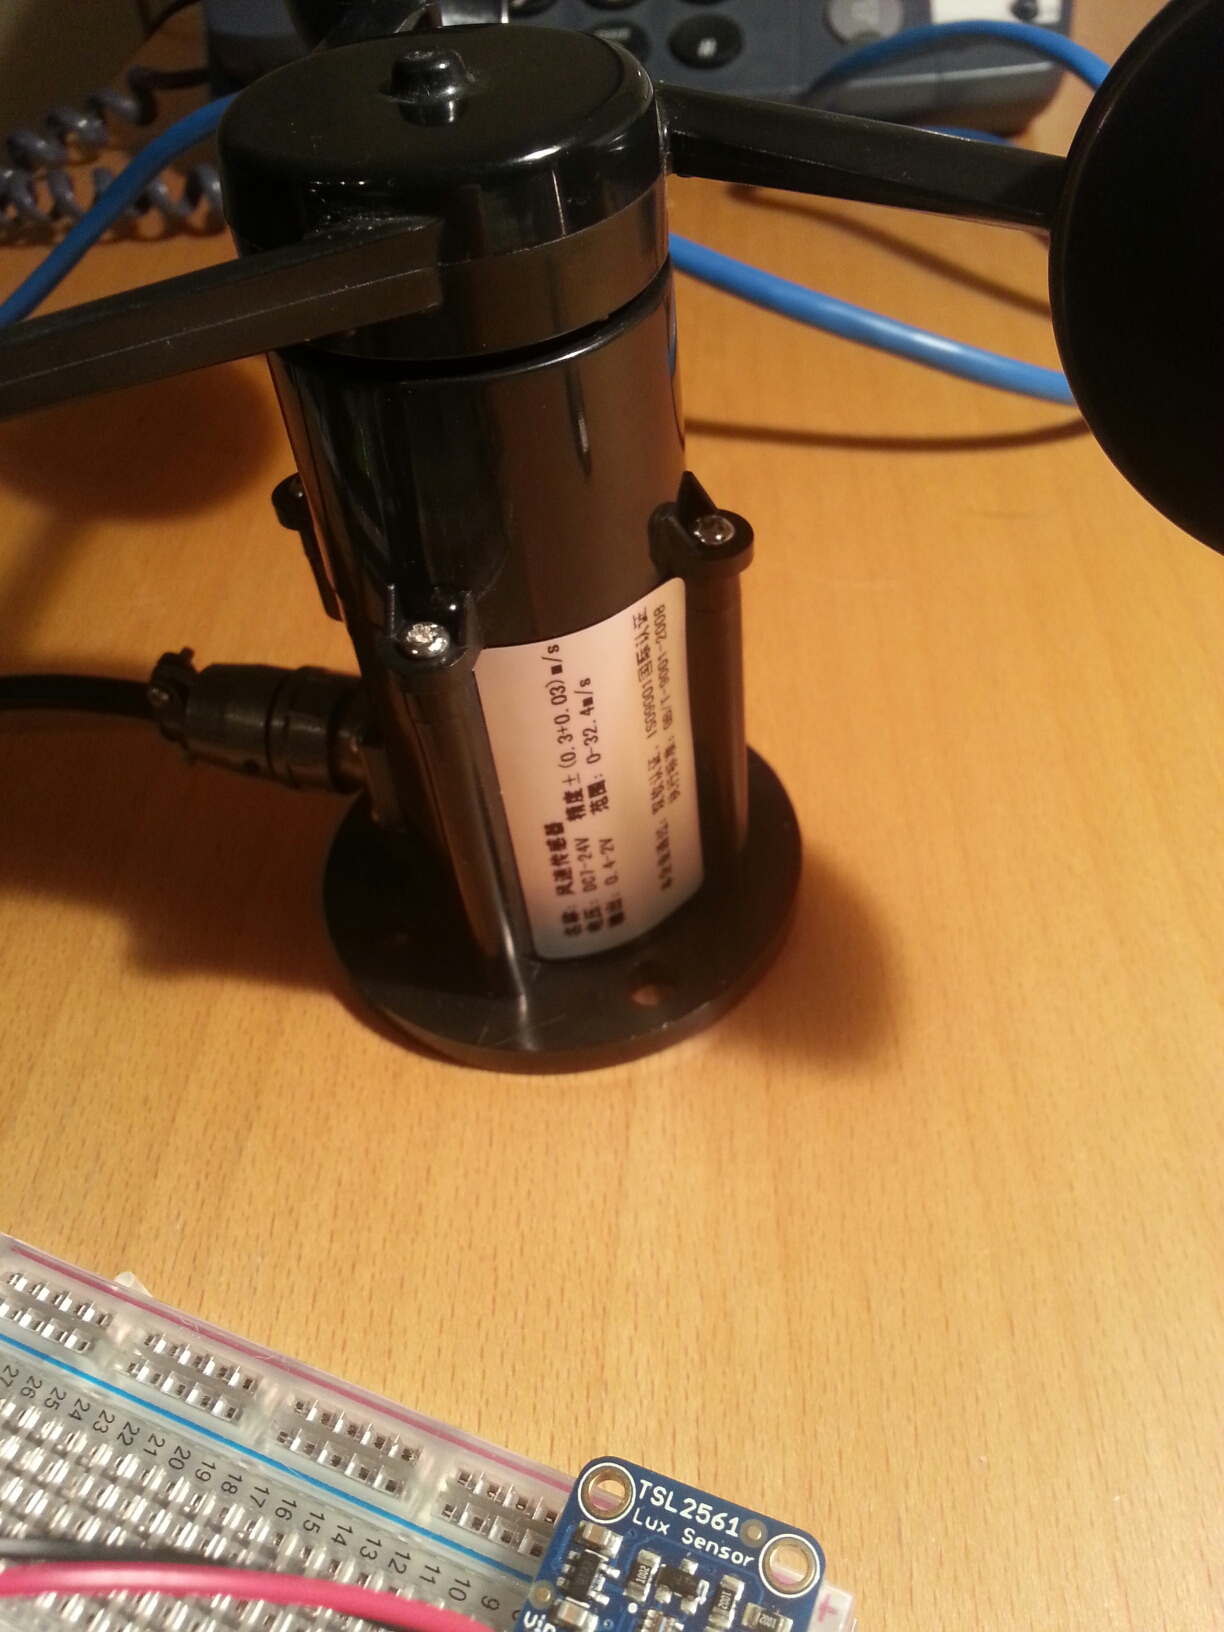


](/wp-content/uploads/lowtechhigh/2014/10/myenvi.png)
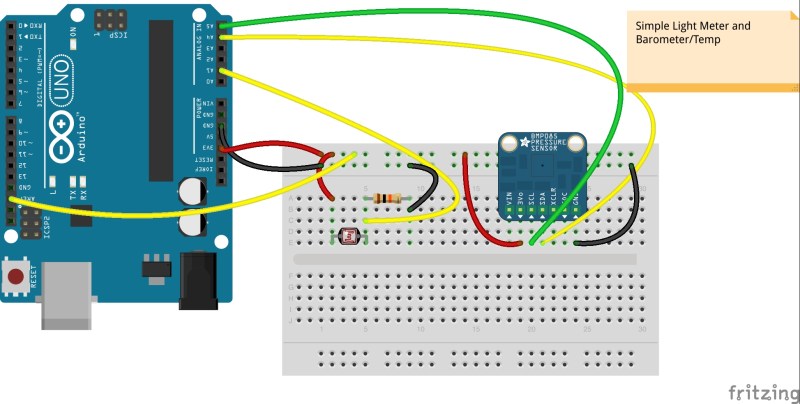
](/wp-content/uploads/lowtechhigh/2014/06/lightmeter_bb.jpg)