1. Complete Handmade Bicycle!

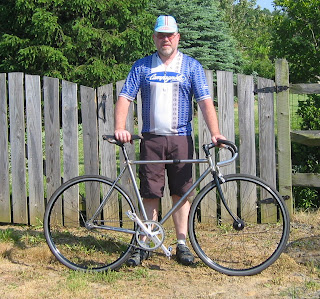
    Took it on it's first test ride on the W+OD trail! It rode surprisingly well for my first frame. Also took it into DC today and rode around the city without any problems.
    ![]({static}/wp-content/uploads/blogger/completebike.jpg)
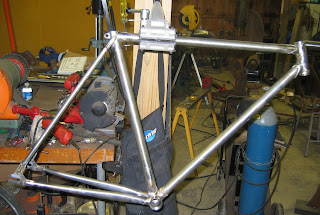
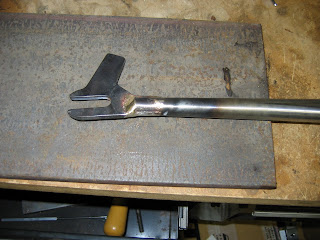
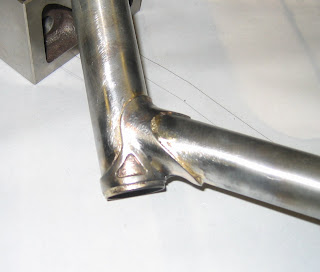
Next on the list is to build another one without lugs. Plan on just doing some fillet brazing. Also want to tackle a fork (sorry for the Tange in the picture;).

    Thanks to all my friends and family that supported my efforts! Special thanks to [Plum Grove Cyclery](http://www.plumgrovecyclery.com/) for their expert help, Campy frame tools and necessary build out parts. Could not have done it without them. Special thanks to [Rich Adams](http://www.bicycleframes.com/) and [Around Town Bicycles](http://www.atownbikes.com/) in Wilkes Barre PA. The have been very supportive and Rich was always willing to answer my emails. I plan on doing a more verbose post about the whole experience soon.... stay tuned.
    read more
  2. Bicycle Frame Complete!

    First bicycle frame complete! I started working on the lug cleanup and will get ready for paint. I may clear coat it so I can remind myself later about the quality of the initial lugs/brazing.

    ![]({static}/wp-content/uploads/blogger/completeframe.jpg)All and all I am pleased with the way it came out. Clean up and test ride remains!. Will write up a longer post later about lessons learned and thanks to all that supported this effort.

    read more
  3. Bicycle Frame - Seat Stay Bridge Installed

    Last braze to be done before frame is finished (well finished all but the cleanup/eye candy). Cut left over seat stay to fit as bridge. Fixie so I don't need a hole for the brakes.
    ![]({static}/wp-content/uploads/blogger/seatbridgetube.jpg) Brazing Done! Also cut the seat tube binder! Frame Complete! ![]({static}/wp-content/uploads/blogger/seatbridge.jpg)

    read more
  4. Bicycle Chain Stays

    Chain Stays have been notched and the track style dropout has been brazed on.

    Having a bit of a problem with the far chain stay as it hits the frame jig before it is seated properly against the dummy axle.
    ![]({static}/wp-content/uploads/blogger/chainstays.jpg)
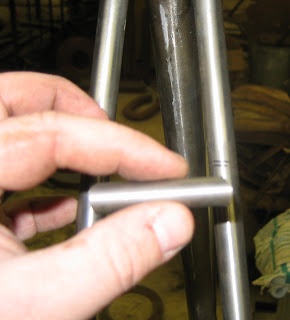
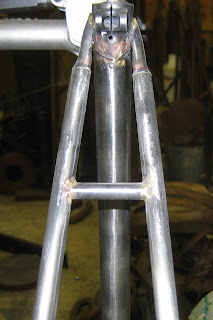
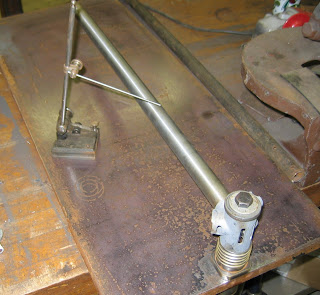
In the process of figuring out why the chain stay won't fit the jig. Good chance I did something wrong... more later.
    read more
  5. Bicycle Seat Stays and Chain Stays

    Next step in the frame building process is to figure out the rear triangle (I know, don't have the main triangle quite done yet). This will be a track bike as you can see and will use a vintage style seat stay attachment flute.

    read more
  6. Makeshift Bicycle Alignment Table

    I had a piece of 1 inch plate hanging around and jury rigged a bottom bracket holder. It worked pretty well. Need to work on the bottom bracket holder some more to get rid of the washers as they are not strong enough. But like I said it seemed to work well enough for now.
    ![]({static}/wp-content/uploads/blogger/makeshiftalignmenttable.jpg) Close up view of the bottom bracket holder. Had some old machined tractor parts hanging around that worked out quite well. Drilled out the plate and attached the fixture and was able to cold set my first seat tube / bottom bracket assembly.![]({static}/wp-content/uploads/blogger/makeshiftalignmentclose.jpg)
    read more
  7. Bicycle Frame - Front Triangle Ready to Braze!

    Main triangle is all setup and triple checked for proper length. Next steps will be to get jig all set in place, remove pieces and add all the flux and reassemble in jig. Tack all the joints (maybe complete in jig, not sure yet) and check for alignment before finishing all the joints.![]({static}/wp-content/uploads/blogger/fronttriinjig.jpg)
    read more
  8. First Lugged Joint - Bottom of Head Tube / Down Tube

    My first brazed lug! I bit more brass than I probably needed so the cleanup was a bit much. I do think that the penetration of the joint was good though. I did some cold setting on it and it did not flinch. Overall I am pleased with the newbie attempt.
    ![]({static}/wp-content/uploads/blogger/lowerheadlug.jpg)
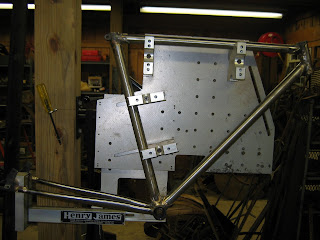
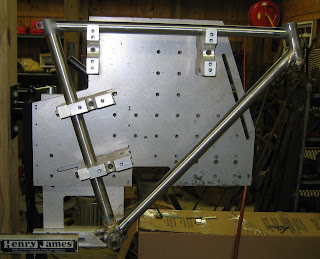
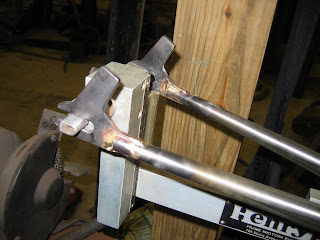
Going to find a source for "blemished" lugs so that I can practice a whole lot without breaking the bank.
    read more

links

social