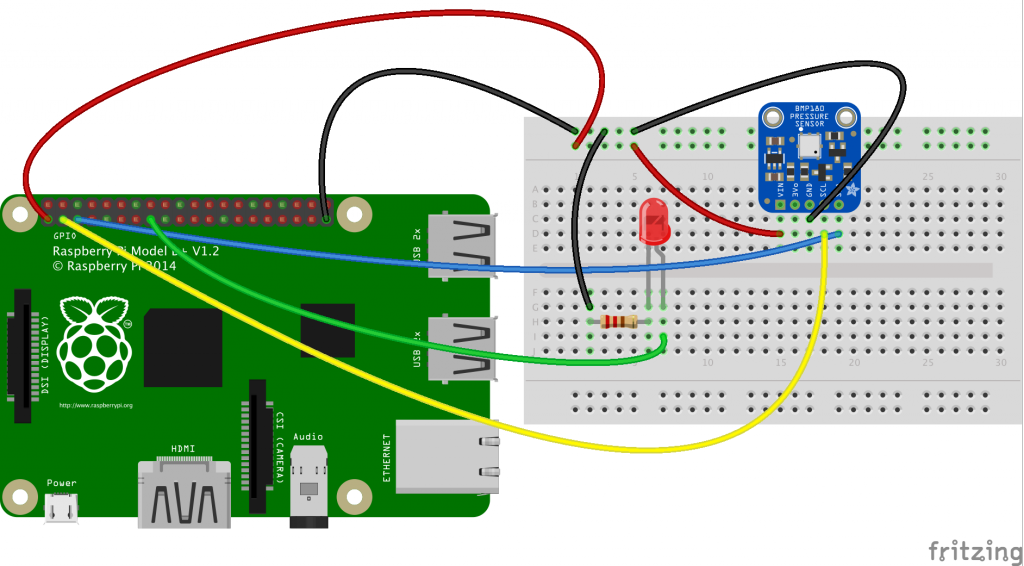
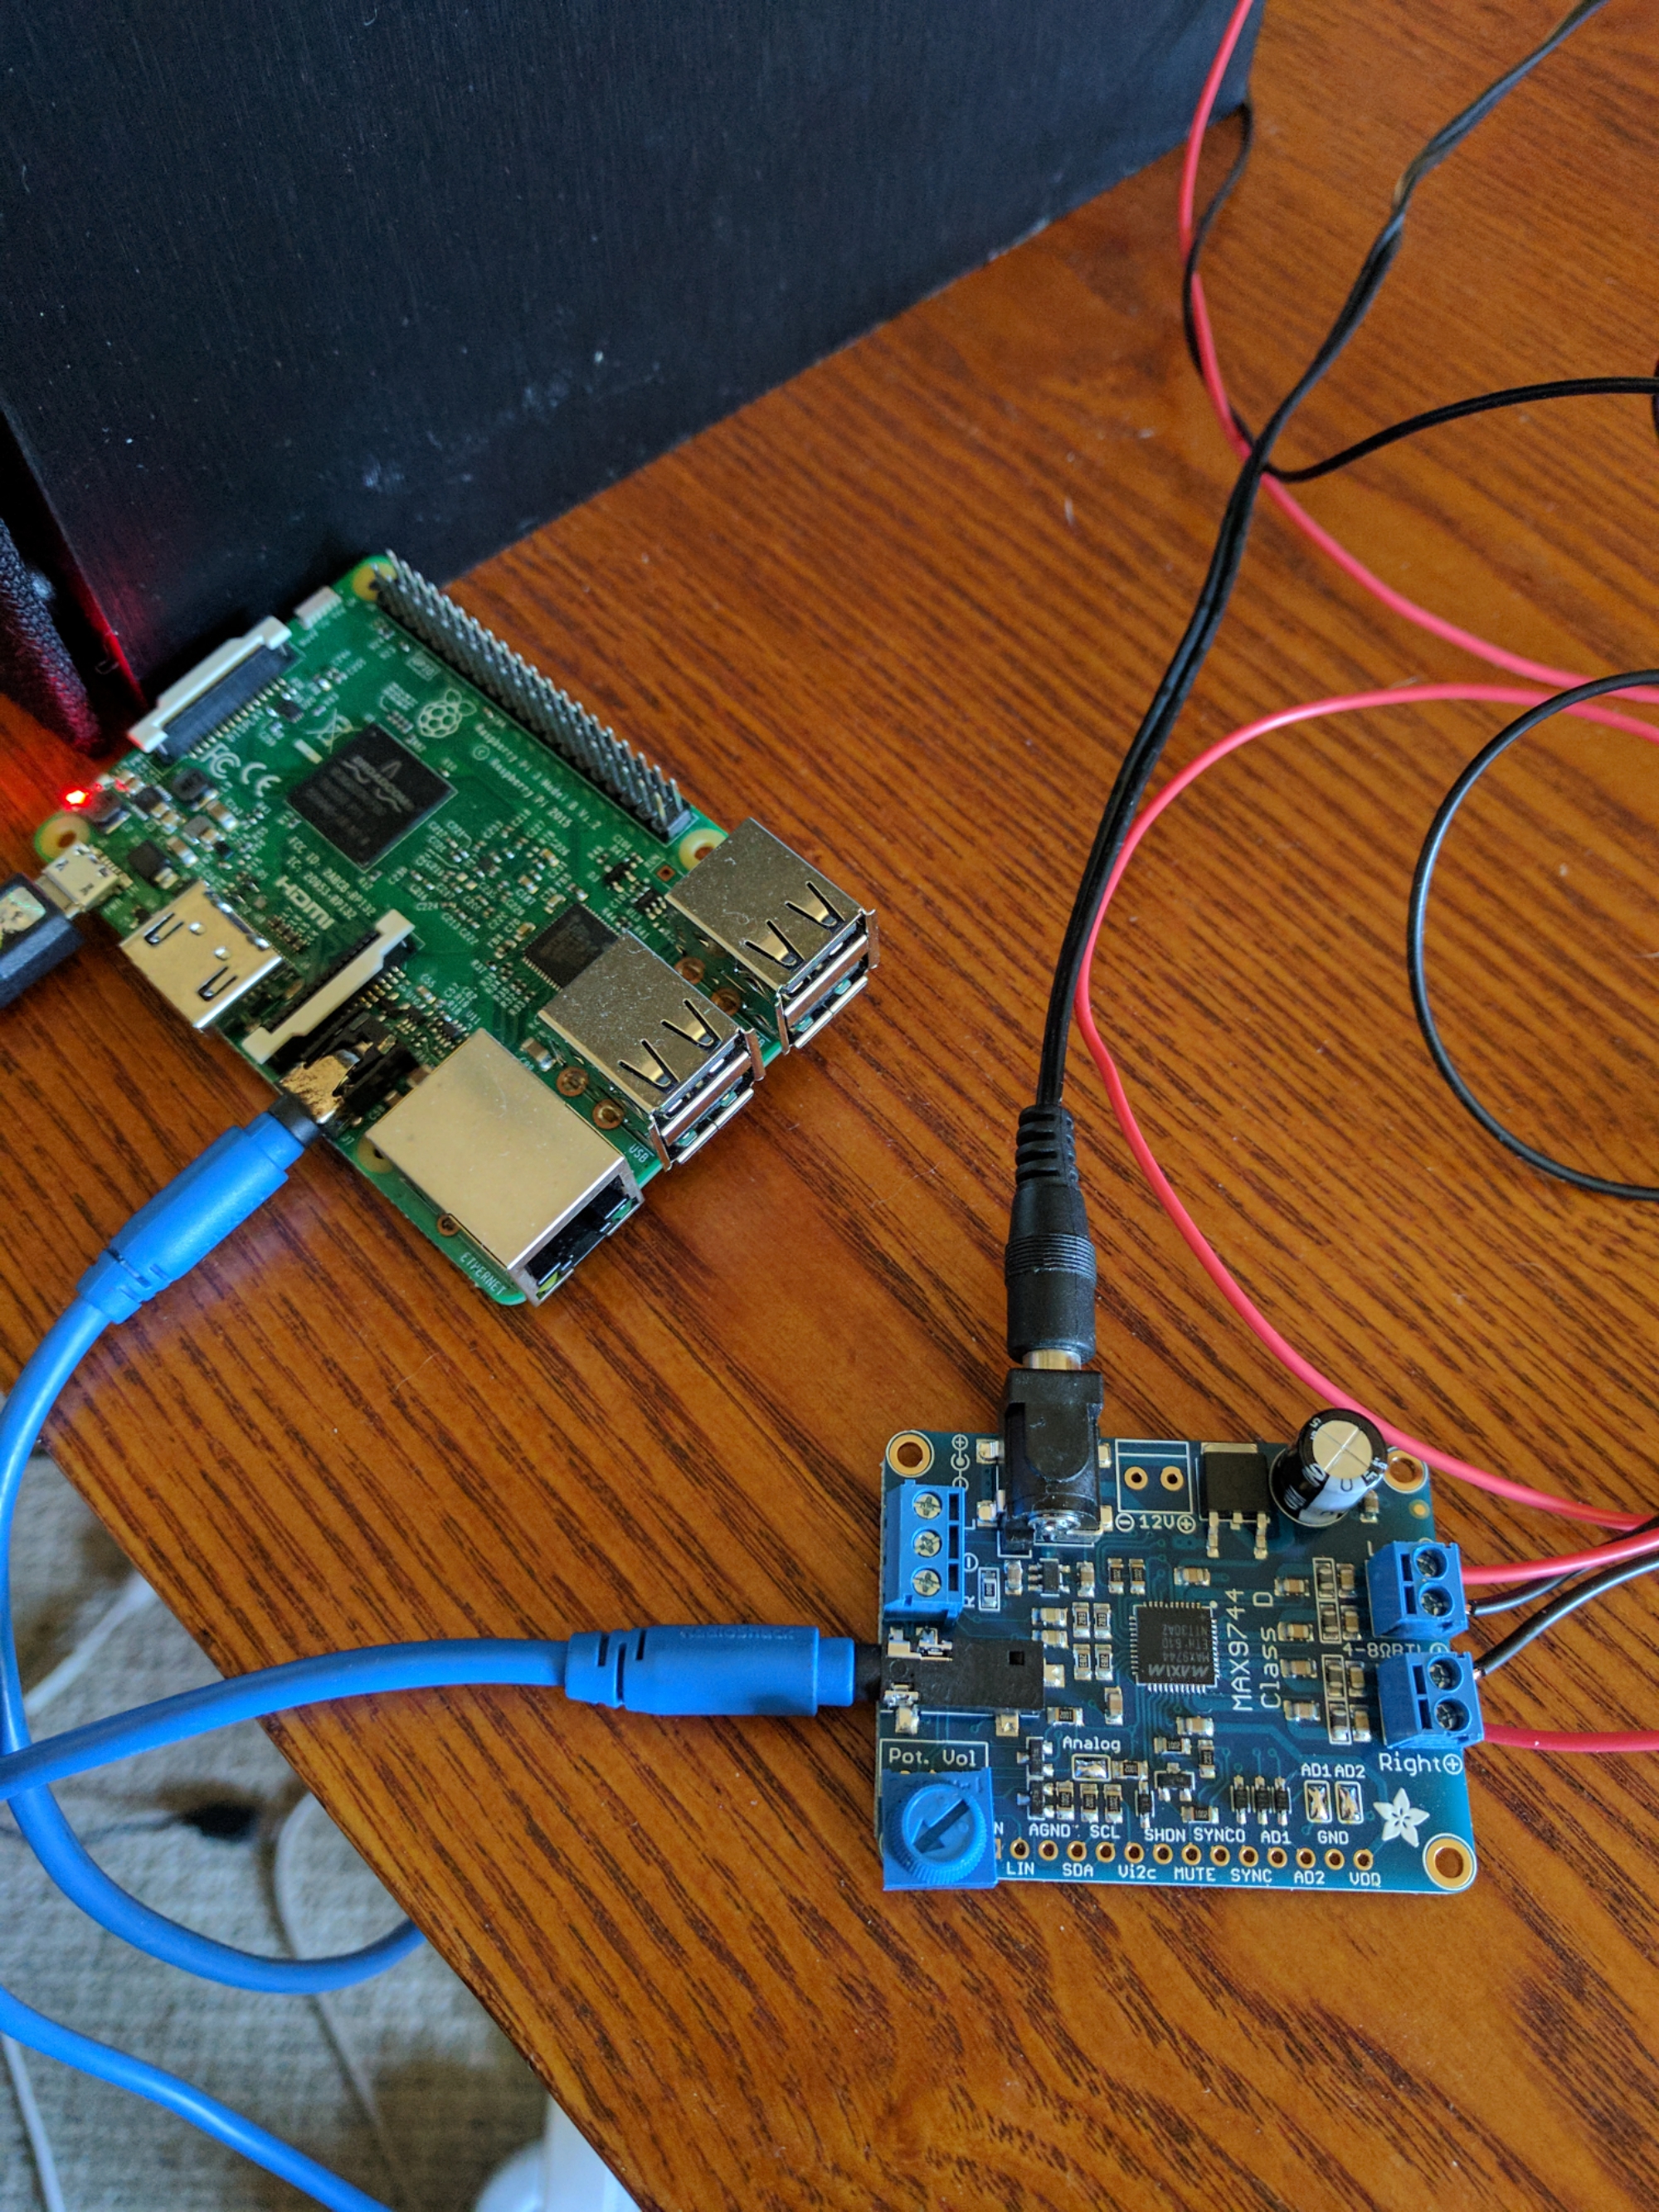
Simple RaspberryPi B+ with BMP180 and LED on GPIO22 for demonstration of AWS/IOT with MQTT. The following code was modified from the Connecting your RaspberryPi to AWS IoT tutorial.
'''
/*
 * Copyright 2010-2017 Amazon.com, Inc. or its affiliates. All Rights Reserved.
 *
 * Licensed under the Apache License, Version 2.0 (the "License").
 * You may not use this file except in compliance with the License.
 * A copy of the License is located at
 *
 *  http://aws.amazon.com/apache2.0
 *
 * or in the "license" file accompanying this file. This file is distributed
 * on an "AS IS" BASIS, WITHOUT WARRANTIES OR CONDITIONS OF ANY KIND, either
 * express or implied. See the License for the specific language governing
 * permissions and limitations under the License.
 */
 '''

from AWSIoTPythonSDK.MQTTLib import AWSIoTMQTTClient
import logging
import time
import argparse
import json

#import for GPIO Usage on RaspberryPi
import RPi.GPIO as GPIO
#Pins for LED Example
GPIO.setmode(GPIO.BCM)
GPIO.setup(22,GPIO.OUT)

# Import / Setup  BMP Sensor
import Adafruit_BMP.BMP085 as BMP085
sensor = BMP085.BMP085()

AllowedActions = ['both', 'publish', 'subscribe']

# Custom MQTT message callback
# Added Temp info from BMP Sensor and logic to turn on/off led
# when temp above 20.2C
def customCallback(client, userdata, message):
    print("Received a new message: ")
    print(message.payload)
    Mytemp = json.loads(message.payload)
    print("MY TEMP IN THE OFFICE: ")
    print (Mytemp['Temp'])
    if (Mytemp['Temp'] > 20.2):
        GPIO.output(22,1)
    else:
        GPIO.output(22,0)

    print("from topic: ")
    print(message.topic)
    print("--------------\n\n")

# Read in command-line parameters
parser = argparse.ArgumentParser()
parser.add_argument("-e", "--endpoint", action="store", required=True, dest="host", help="Your AWS IoT custom endpoint")
parser.add_argument("-r", "--rootCA", action="store", required=True, dest="rootCAPath", help="Root CA file path")
parser.add_argument("-c", "--cert", action="store", dest="certificatePath", help="Certificate file path")
parser.add_argument("-k", "--key", action="store", dest="privateKeyPath", help="Private key file path")
parser.add_argument("-p", "--port", action="store", dest="port", type=int, help="Port number override")
parser.add_argument("-w", "--websocket", action="store_true", dest="useWebsocket", default=False,
                    help="Use MQTT over WebSocket")
parser.add_argument("-id", "--clientId", action="store", dest="clientId", default="basicPubSub",
                    help="Targeted client id")
parser.add_argument("-t", "--topic", action="store", dest="topic", default="sdk/test/Python", help="Targeted topic")
parser.add_argument("-m", "--mode", action="store", dest="mode", default="both",
                    help="Operation modes: %s"%str(AllowedActions))
parser.add_argument("-M", "--message", action="store", dest="message", default="Hello World!",
                    help="Message to publish")

args = parser.parse_args()
host = args.host
rootCAPath = args.rootCAPath
certificatePath = args.certificatePath
privateKeyPath = args.privateKeyPath
port = args.port
useWebsocket = args.useWebsocket
clientId = args.clientId
topic = args.topic

if args.mode not in AllowedActions:
    parser.error("Unknown --mode option %s. Must be one of %s" % (args.mode, str(AllowedActions)))
    exit(2)

if args.useWebsocket and args.certificatePath and args.privateKeyPath:
    parser.error("X.509 cert authentication and WebSocket are mutual exclusive. Please pick one.")
    exit(2)

if not args.useWebsocket and (not args.certificatePath or not args.privateKeyPath):
    parser.error("Missing credentials for authentication.")
    exit(2)

# Port defaults
if args.useWebsocket and not args.port:  # When no port override for WebSocket, default to 443
    port = 443
if not args.useWebsocket and not args.port:  # When no port override for non-WebSocket, default to 8883
    port = 8883

# Configure logging
logger = logging.getLogger("AWSIoTPythonSDK.core")
logger.setLevel(logging.DEBUG)
streamHandler = logging.StreamHandler()
formatter = logging.Formatter('%(asctime)s - %(name)s - %(levelname)s - %(message)s')
streamHandler.setFormatter(formatter)
logger.addHandler(streamHandler)

# Init AWSIoTMQTTClient
myAWSIoTMQTTClient = None
if useWebsocket:
    myAWSIoTMQTTClient = AWSIoTMQTTClient(clientId, useWebsocket=True)
    myAWSIoTMQTTClient.configureEndpoint(host, port)
    myAWSIoTMQTTClient.configureCredentials(rootCAPath)
else:
    myAWSIoTMQTTClient = AWSIoTMQTTClient(clientId)
    myAWSIoTMQTTClient.configureEndpoint(host, port)
    myAWSIoTMQTTClient.configureCredentials(rootCAPath, privateKeyPath, certificatePath)

# AWSIoTMQTTClient connection configuration
myAWSIoTMQTTClient.configureAutoReconnectBackoffTime(1, 32, 20)
myAWSIoTMQTTClient.configureOfflinePublishQueueing(-1)  # Infinite offline Publish queueing
myAWSIoTMQTTClient.configureDrainingFrequency(2)  # Draining: 2 Hz
myAWSIoTMQTTClient.configureConnectDisconnectTimeout(10)  # 10 sec
myAWSIoTMQTTClient.configureMQTTOperationTimeout(5)  # 5 sec

# Connect and subscribe to AWS IoT
myAWSIoTMQTTClient.connect()
if args.mode == 'both' or args.mode == 'subscribe':
    myAWSIoTMQTTClient.subscribe(topic, 1, customCallback)
time.sleep(2)

# Publish to the same topic in a loop forever
loopCount = 10
while True:

    Temp = sensor.read_temperature()
    print ("TEMP: " + str(Temp))
    if args.mode == 'both' or args.mode == 'publish':
        message = {}
        message['Temp'] = Temp
        message['sequence'] = loopCount
        messageJson = json.dumps(message)
        myAWSIoTMQTTClient.publish(topic, messageJson, 1)
        if args.mode == 'publish':
            print('Published topic %s: %s\n' % (topic, messageJson))
        loopCount += 1
    time.sleep(2)
python basicPubSub.py -e YOURAWSIOTSHADOW.us-east-1.amazonaws.com -r root-CA.crt -c MyRasp.cert.pem -k MyRasp.private.key
I am still learning the AWS IoT basics and have posted this as a reminder to myself as to how it got setup. I planned on refining this into tutorial but really did not see the need as the AWS Samples are pretty good. Connecting your RaspberryPi to AWS IoT is your best place to start.

