RaspberryPi on AWS IoT – MQTT simple PubSub Example

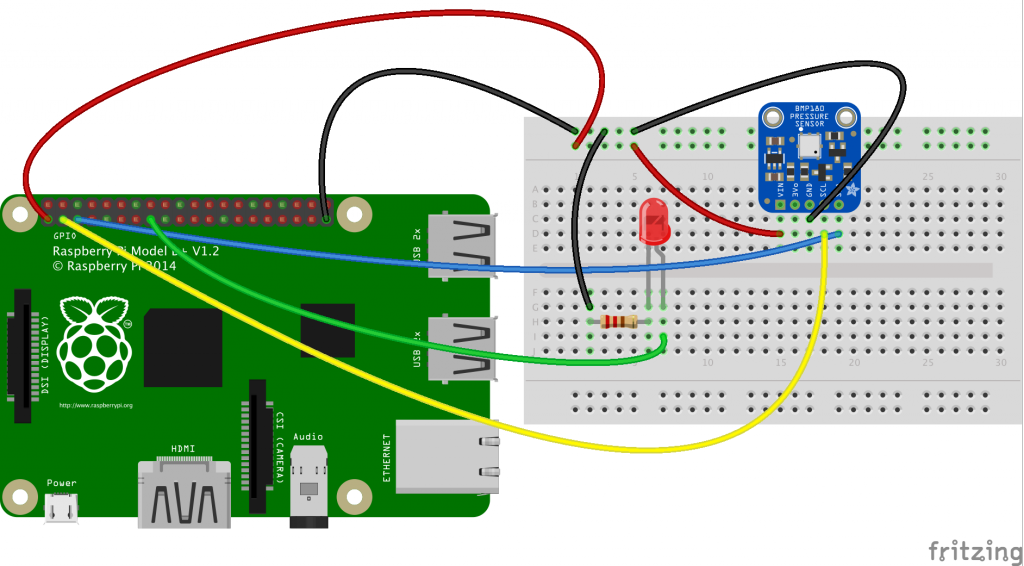
Simple RaspberryPi B+ with BMP180 and LED on GPIO22 for demonstration of AWS/IOT with MQTT.  The following code was modified from the Connecting your RaspberryPi to AWS IoT tutorial.

'''
/*
 * Copyright 2010-2017 Amazon.com, Inc. or its affiliates. All Rights Reserved.
 *
 * Licensed under the Apache License, Version 2.0 (the "License").
 * You may not use this file except in compliance with the License.
 * A copy of the License is located at
 *
 *  http://aws.amazon.com/apache2.0
 *
 * or in the "license" file accompanying this file. This file is distributed
 * on an "AS IS" BASIS, WITHOUT WARRANTIES OR CONDITIONS OF ANY KIND, either
 * express or implied. See the License for the specific language governing
 * permissions and limitations under the License.
 */
 '''

from AWSIoTPythonSDK.MQTTLib import AWSIoTMQTTClient
import logging
import time
import argparse
import json

#import for GPIO Usage on RaspberryPi
import RPi.GPIO as GPIO
#Pins for LED Example
GPIO.setmode(GPIO.BCM)
GPIO.setup(22,GPIO.OUT)

# Import / Setup  BMP Sensor 
import Adafruit_BMP.BMP085 as BMP085
sensor = BMP085.BMP085()

AllowedActions = ['both', 'publish', 'subscribe']

# Custom MQTT message callback 
# Added Temp info from BMP Sensor and logic to turn on/off led
# when temp above 20.2C 
def customCallback(client, userdata, message):
    print("Received a new message: ")
    print(message.payload)
    Mytemp = json.loads(message.payload)
    print("MY TEMP IN THE OFFICE: ")
    print (Mytemp['Temp'])
    if (Mytemp['Temp'] > 20.2):
        GPIO.output(22,1)
    else:
        GPIO.output(22,0)
        
    print("from topic: ")
    print(message.topic)
    print("--------------\n\n")

# Read in command-line parameters
parser = argparse.ArgumentParser()
parser.add_argument("-e", "--endpoint", action="store", required=True, dest="host", help="Your AWS IoT custom endpoint")
parser.add_argument("-r", "--rootCA", action="store", required=True, dest="rootCAPath", help="Root CA file path")
parser.add_argument("-c", "--cert", action="store", dest="certificatePath", help="Certificate file path")
parser.add_argument("-k", "--key", action="store", dest="privateKeyPath", help="Private key file path")
parser.add_argument("-p", "--port", action="store", dest="port", type=int, help="Port number override")
parser.add_argument("-w", "--websocket", action="store_true", dest="useWebsocket", default=False,
                    help="Use MQTT over WebSocket")
parser.add_argument("-id", "--clientId", action="store", dest="clientId", default="basicPubSub",
                    help="Targeted client id")
parser.add_argument("-t", "--topic", action="store", dest="topic", default="sdk/test/Python", help="Targeted topic")
parser.add_argument("-m", "--mode", action="store", dest="mode", default="both",
                    help="Operation modes: %s"%str(AllowedActions))
parser.add_argument("-M", "--message", action="store", dest="message", default="Hello World!",
                    help="Message to publish")

args = parser.parse_args()
host = args.host
rootCAPath = args.rootCAPath
certificatePath = args.certificatePath
privateKeyPath = args.privateKeyPath
port = args.port
useWebsocket = args.useWebsocket
clientId = args.clientId
topic = args.topic

if args.mode not in AllowedActions:
    parser.error("Unknown --mode option %s. Must be one of %s" % (args.mode, str(AllowedActions)))
    exit(2)

if args.useWebsocket and args.certificatePath and args.privateKeyPath:
    parser.error("X.509 cert authentication and WebSocket are mutual exclusive. Please pick one.")
    exit(2)

if not args.useWebsocket and (not args.certificatePath or not args.privateKeyPath):
    parser.error("Missing credentials for authentication.")
    exit(2)

# Port defaults
if args.useWebsocket and not args.port:  # When no port override for WebSocket, default to 443
    port = 443
if not args.useWebsocket and not args.port:  # When no port override for non-WebSocket, default to 8883
    port = 8883

# Configure logging
logger = logging.getLogger("AWSIoTPythonSDK.core")
logger.setLevel(logging.DEBUG)
streamHandler = logging.StreamHandler()
formatter = logging.Formatter('%(asctime)s - %(name)s - %(levelname)s - %(message)s')
streamHandler.setFormatter(formatter)
logger.addHandler(streamHandler)

# Init AWSIoTMQTTClient
myAWSIoTMQTTClient = None
if useWebsocket:
    myAWSIoTMQTTClient = AWSIoTMQTTClient(clientId, useWebsocket=True)
    myAWSIoTMQTTClient.configureEndpoint(host, port)
    myAWSIoTMQTTClient.configureCredentials(rootCAPath)
else:
    myAWSIoTMQTTClient = AWSIoTMQTTClient(clientId)
    myAWSIoTMQTTClient.configureEndpoint(host, port)
    myAWSIoTMQTTClient.configureCredentials(rootCAPath, privateKeyPath, certificatePath)

# AWSIoTMQTTClient connection configuration
myAWSIoTMQTTClient.configureAutoReconnectBackoffTime(1, 32, 20)
myAWSIoTMQTTClient.configureOfflinePublishQueueing(-1)  # Infinite offline Publish queueing
myAWSIoTMQTTClient.configureDrainingFrequency(2)  # Draining: 2 Hz
myAWSIoTMQTTClient.configureConnectDisconnectTimeout(10)  # 10 sec
myAWSIoTMQTTClient.configureMQTTOperationTimeout(5)  # 5 sec

# Connect and subscribe to AWS IoT
myAWSIoTMQTTClient.connect()
if args.mode == 'both' or args.mode == 'subscribe':
    myAWSIoTMQTTClient.subscribe(topic, 1, customCallback)
time.sleep(2)

# Publish to the same topic in a loop forever
loopCount = 10
while True:
    
    Temp = sensor.read_temperature()
    print ("TEMP: " + str(Temp))
    if args.mode == 'both' or args.mode == 'publish':
        message = {}
        message['Temp'] = Temp
        message['sequence'] = loopCount
        messageJson = json.dumps(message)
        myAWSIoTMQTTClient.publish(topic, messageJson, 1)
        if args.mode == 'publish':
            print('Published topic %s: %s\n' % (topic, messageJson))
        loopCount += 1
    time.sleep(2) 


python basicPubSub.py -e YOURAWSIOTSHADOW.us-east-1.amazonaws.com -r root-CA.crt -c MyRasp.cert.pem -k MyRasp.private.key

I am still learning the AWS IoT basics and have posted this as a reminder to myself as to how it got setup. I planned on refining this into tutorial but really did not see the need as the AWS Samples are pretty good. Connecting your RaspberryPi to AWS IoT  is your best place to start.

First Wearable?

Came across this advertisement in a 1896 Bicycle News .  Certainly the earliest Wearable I have seen.  I did dig around some other ephemera I have to see if I could spot some more but came up empty.  Early 1900 Youth Companion thru 70’s Electronic Mags showed no signs of anything similar.

Espotek Labrador – Open Hardware Oscilloscope

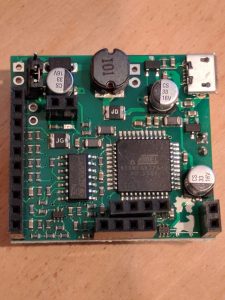
Got my EspoTek Labrador Oscilloscope from Crowd Supply.  It has been a long while since playing around with an Oscilloscope let alone an open hardware one like this.  Here is my first look:

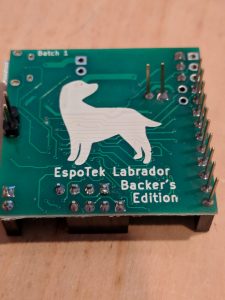
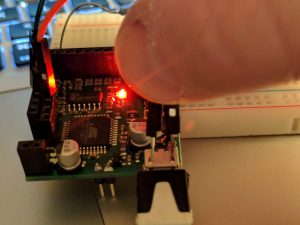
Couple of shots out of the box

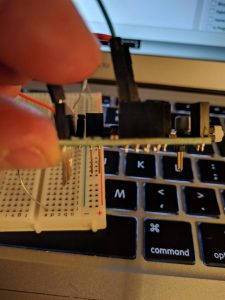
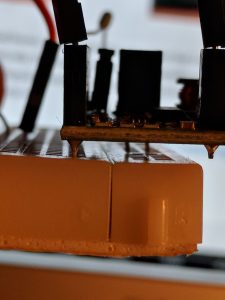
Connected to a bread board:  Not absolutely necessary but I would suggest starting with it.  Basically fits nicely on a standard breadboard.  Note, the pins for Power Supply and the Signal Generator and “Digital Outs” line up on the bread board for a pretty handy.  Do take care inserting into the breadboard as they legs are pretty long and I would say not exact but they do work.

Had to dig a bit for this but found the Pinout diagram – very helpful of course.  There are no pinout descriptions on the device itself or at least any legible ones for these old eyes so keep the PinOut link handy.

First, get oscilloscope software for your device at their github repo: EspoTek Labrador Releases and get it installed.  I had one issue getting the device to be recognized on my MacBook Air but a simple unplug/replug in the USB cable did the trick.  There may be a sequence to follow but I have not played more with is since it started working.

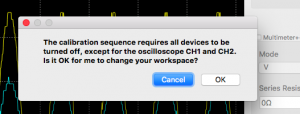
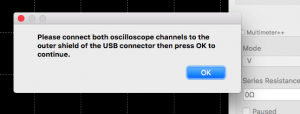
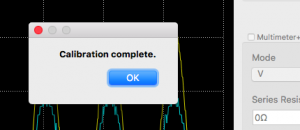
Have a couple of wires ready to calibrate it on startup.  The basic calibration process require (appears you ground out the Oscilloscope CH1 and CH2 to the USB housing).

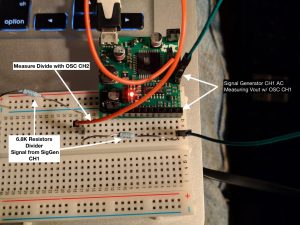
Next I basically recreated the sample from their wiki Tutorial: Connecting a Simple Circuit to the EspoTek Labrador

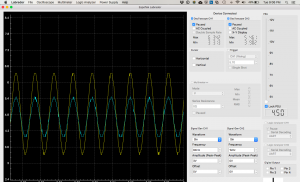
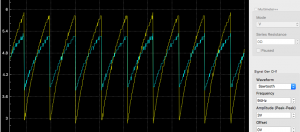
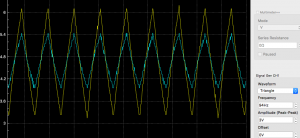
Messed around a bit with the signal generator using the same circuit: Not sure what is going on with the Square wave but the other waveforms look accurate.

All and all pretty please with the Labrador Oscilloscope.  Will mess with the Multimeter and Logic Analyzer soon enough.

Pycom WiFi revisit

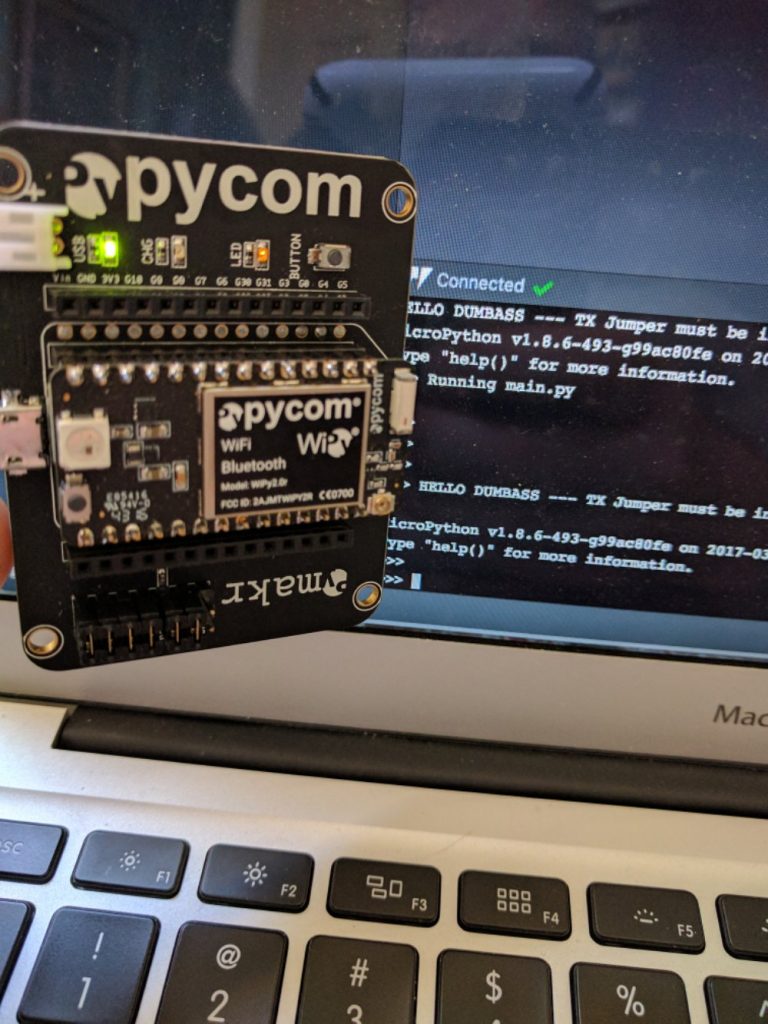
So I gave it rest after my initial foray into messing with the Pycom device I got back to it.  Updated Atom, updated Pymakr plugin – still need to update firmware.  More on that later.  I found the issue with my USB serial connection woes…turns out (for whatever reason, my TX jumper was disconnected.  The pretty much makes serial connection flakey at best.  Jumper in place and board communication is going well.

WiPy 2.0 and Atom

Yup, dumbass moment with pycom.

WiPy 2.0 and Atom

Yesterday I posted how the WiPy 2.0 and Atom had trouble connecting over IP address and that USB worked great. Well no more. Today for no apparent reason the connection is wonky. Code runs, shows in console, exits and goes to REPL prompt. >> Can’t type in console at that point, reconnect does note reconnect, reset device, code reruns as console show output. Can’t sync, won’t connect……blah 1 hour wasted.

PyCom says they have PyMakr plugin for other editors, cool. Loaded up Sublime, no PyMakr to be found in package list (assuming that’s where it would be but just guessing because PyCom docs are less than accurate.

Next up PyCharm …wait not ready yet according to recent forum post…

I have a brick!

OK, looks like for whatever reason repl>> command line is busted.  Does not work in Atom and or in screen /dev/cu.ser…. mode.

I will have a look some more tomorrow but as far as I can tell – PyCom is not ready for prime time.

PyCom WiPy 2.0

Getting acclimated to the WiPy 2.0 and Expansion Board.  My first “hello world” if you will is to get a TSL2591 Light Sensor running.  It is an i2c device.

Initial Notes on WiPy 2.0 Setup:

  • Datasheet for Expansion Board are difficult to understand.  I assumed that the pinouts would closely resemble that of the WiPy 2.0 but they are not even close.  I am still working with the Expansion Board but dread pulling the WiPy 2.0 off of it and having to rework the circuit
  • ATOM w/Pymkr is flakey at best.  Sync Folder setting not working for me.  I find myself having to restart ATOM after a while as it stops responding often.
  • Firmware Upgrade Fails: I think?  Can’t tell what the latest firmware should be so I am not sure what, if anything happened.
  • Connection with ATOM via IP address never worked.  USB connection is working great.

TSL2991 Code:

Stole this from https://github.com/maxlklaxl/python-tsl2591

Out of the box this code did not work with the WiPy 2.0.  After debugging a bit it turns out the pin outs for SDA and SCL needed to be changed.

Code Snippet (line 52ish of tsl2951.py that I changed to work with WiPy 2.0

[sourcecode language=”python” wraplines=”false” collapse=”false”]
from machine import I2C, Pin
class SMBusEmulator:
__slots__ = (‘i2c’,)
def __init__(self):
self.i2c = I2C(pins=("P8", "P23")) #SDA SCL respectively
[/sourcecode]

Full Code:

[sourcecode language=”python” wraplines=”false” collapse=”false”]
# tsl2591 lux sensor interface
import time

VISIBLE = 2
INFRARED = 1
FULLSPECTRUM = 0

ADDR = 0x29
READBIT = 0x01
COMMAND_BIT = 0xA0
CLEAR_BIT = 0x40
WORD_BIT = 0x20
BLOCK_BIT = 0x10
ENABLE_POWERON = 0x01
ENABLE_POWEROFF = 0x00
ENABLE_AEN = 0x02
ENABLE_AIEN = 0x10
CONTROL_RESET = 0x80
LUX_DF = 408.0
LUX_COEFB = 1.64
LUX_COEFC = 0.59
LUX_COEFD = 0.86

REGISTER_ENABLE = 0x00
REGISTER_CONTROL = 0x01
REGISTER_THRESHHOLDL_LOW = 0x02
REGISTER_THRESHHOLDL_HIGH = 0x03
REGISTER_THRESHHOLDH_LOW = 0x04
REGISTER_THRESHHOLDH_HIGH = 0x05
REGISTER_INTERRUPT = 0x06
REGISTER_CRC = 0x08
REGISTER_ID = 0x0A
REGISTER_CHAN0_LOW = 0x14
REGISTER_CHAN0_HIGH = 0x15
REGISTER_CHAN1_LOW = 0x16
REGISTER_CHAN1_HIGH = 0x17
INTEGRATIONTIME_100MS = 0x00
INTEGRATIONTIME_200MS = 0x01
INTEGRATIONTIME_300MS = 0x02
INTEGRATIONTIME_400MS = 0x03
INTEGRATIONTIME_500MS = 0x04
INTEGRATIONTIME_600MS = 0x05

GAIN_LOW = 0x00
GAIN_MED = 0x10
GAIN_HIGH = 0x20
GAIN_MAX = 0x30

def _bytes_to_int(data):
return data[0] + (data[1]<<8)

from machine import I2C, Pin
class SMBusEmulator:
__slots__ = (‘i2c’,)
def __init__(self):
self.i2c = I2C(pins=("P8", "P23"))

def write_byte_data(self, addr, cmd, val):
buf = bytes([cmd, val])
self.i2c.writeto(addr, buf)

def read_word_data(self, addr, cmd):
assert cmd < 256
buf = bytes([cmd])
self.i2c.writeto(addr, buf)
data = self.i2c.readfrom(addr, 4)
return _bytes_to_int(data)

SENSOR_ADDRESS=0x29

class Tsl2591:
def __init__(
self,
sensor_id,
integration=INTEGRATIONTIME_100MS,
gain=GAIN_LOW
):
print(sensor_id)
self.sensor_id = sensor_id
self.bus = SMBusEmulator()
self.integration_time = integration
self.gain = gain
self.set_timing(self.integration_time)
self.set_gain(self.gain)
self.disable()

def set_timing(self, integration):
self.enable()
self.integration_time = integration
self.bus.write_byte_data(
SENSOR_ADDRESS,
COMMAND_BIT | REGISTER_CONTROL,
self.integration_time | self.gain
)
self.disable()

def set_gain(self, gain):
self.enable()
self.gain = gain
self.bus.write_byte_data(
SENSOR_ADDRESS,
COMMAND_BIT | REGISTER_CONTROL,
self.integration_time | self.gain
)
self.disable()

def calculate_lux(self, full, ir):
if (full == 0xFFFF) | (ir == 0xFFFF):
return 0

case_integ = {
INTEGRATIONTIME_100MS: 100.,
INTEGRATIONTIME_200MS: 200.,
INTEGRATIONTIME_300MS: 300.,
INTEGRATIONTIME_400MS: 400.,
INTEGRATIONTIME_500MS: 500.,
INTEGRATIONTIME_600MS: 600.,
}
if self.integration_time in case_integ.keys():
atime = case_integ[self.integration_time]
else:
atime = 100.

case_gain = {
GAIN_LOW: 1.,
GAIN_MED: 25.,
GAIN_HIGH: 428.,
GAIN_MAX: 9876.,
}

if self.gain in case_gain.keys():
again = case_gain[self.gain]
else:
again = 1.

cpl = (atime * again) / LUX_DF
lux1 = (full – (LUX_COEFB * ir)) / cpl

lux2 = ((LUX_COEFC * full) – (LUX_COEFD * ir)) / cpl

return max([lux1, lux2])

def enable(self):
self.bus.write_byte_data(
SENSOR_ADDRESS,
COMMAND_BIT | REGISTER_ENABLE,
ENABLE_POWERON | ENABLE_AEN | ENABLE_AIEN
)

def disable(self):
self.bus.write_byte_data(
SENSOR_ADDRESS,
COMMAND_BIT | REGISTER_ENABLE,
ENABLE_POWEROFF
)

def get_full_luminosity(self):
self.enable()
time.sleep(0.120*self.integration_time+1)
full = self.bus.read_word_data(
SENSOR_ADDRESS, COMMAND_BIT | REGISTER_CHAN0_LOW
)
ir = self.bus.read_word_data(
SENSOR_ADDRESS, COMMAND_BIT | REGISTER_CHAN1_LOW
)
self.disable()
return full, ir

def get_luminosity(self, channel):
full, ir = self.get_full_luminosity()
if channel == FULLSPECTRUM:
return full
elif channel == INFRARED:
return ir
elif channel == VISIBLE:
return full – ir
else:
return 0

def sample(self):
full, ir = self.get_full_luminosity()
return self.calculate_lux(full, ir)

[/sourcecode]

Simple main.py to print out 10 sensor readings. Hello World Complete!
Will work on posting to the cloud/thingspeak or something of that nature next

[sourcecode language=”python” wraplines=”false” collapse=”false”]
# main.py — put your code here!
import time
from machine import Pin
from machine import I2C
import tsl2591

tsl = tsl2591.Tsl2591(0) # initialize tls2591

cnt = 0

while cnt != 10:
time.sleep(2)
full, ir = tsl.get_full_luminosity() # read raw values (full spectrum and ir spectrum)
lux = tsl.calculate_lux(full, ir) # convert raw values to lux
print(lux, full, ir)
cnt = cnt + 1
[/sourcecode]

Then and Now Volt Meter

Could not help myself…Just had to bring home the Rider VoltOhmyst.  Plugged her in and measured some voltage on some DC batteries as well as some ohms across some resistors. resistors. Dead on…Well after some adjustments and warming up.  Will put on the shelf now.

Dates around 1939.  

Weather Station Code

Current code (needs some clean up but working) for the weather station that post to both Xively and ThingSpeak.

ThingSpeak Weather Channel
Xively Weather Station

[pre lang=”C” wrapline=”false”]
// Includes
#include &lt;Dhcp.h&gt;
#include &lt;Dns.h&gt;
#include &lt;Ethernet.h&gt;
#include &lt;EthernetClient.h&gt;
#include &lt;EthernetServer.h&gt;
#include &lt;EthernetUdp.h&gt;
#include &lt;ThingSpeak.h&gt;
#include &lt;Xively.h&gt;
#include &lt;Wire.h&gt;
#include &lt;Adafruit_Sensor.h&gt;
#include &lt;Adafruit_TSL2561_U.h&gt;
#include &lt;Adafruit_BMP085_U.h&gt;

// Setup TSL2561 and BMP085 Sensors

Adafruit_TSL2561_Unified tsl = Adafruit_TSL2561_Unified(TSL2561_ADDR_FLOAT, 12345);
Adafruit_BMP085_Unified bmp = Adafruit_BMP085_Unified(10085);

// MAC address for your Ethernet shield
byte mac[] = { 0xDE, 0xAA, 0xBB, 0xCC, 0xDE, 0x02 };

//Uploading Data to two different services for comparisons

// Your Xively key to let you upload data
char xivelyKey[] = &quot;YOURKEYHERE&quot;;

// ThingSpeak
unsigned long myChannelNumber = 000000;
const char * myWriteAPIKey = &quot;YOURKEYHERE&quot;;

// Define the strings for our datastream IDs for Xively
char tempID[] = &quot;Temp&quot;;
char lightID[] = &quot;Light&quot;;
char bpID[] = &quot;Barometric_Pressure&quot;;
char wsID[] = &quot;Wind_Speed&quot;;

//Setting up Windspeed
//Thanks Allison Lassiter – hackerscapes.com for help with anemometer code
int sensorPin = A0;
int sensorValue = 0;
float voltageConversionConstant = .0048828125;
float windSpeed = 0;
float sensorVoltage = 0;

float voltageMin = .4; // Mininum output voltage from anemometer in V.
float windSpeedMin = 0; // Wind speed in meters/sec corresponding to minimum voltage

float voltageMax = 2.0; // Maximum output voltage from anemometer in V.
float windSpeedMax = 32; // Wind speed in meters/sec corresponding to maximum voltage

//Data structure for Xively data upload
//Basically one for each sensor
XivelyDatastream datastreams[] = {
XivelyDatastream(tempID, strlen(tempID), DATASTREAM_FLOAT),
XivelyDatastream(lightID, strlen(lightID), DATASTREAM_FLOAT),
XivelyDatastream(bpID, strlen(bpID), DATASTREAM_FLOAT),
XivelyDatastream(wsID, strlen(wsID), DATASTREAM_FLOAT)
};
// Finally, wrap the datastreams into a feed
XivelyFeed feed(00000000, datastreams, 4 /* number of datastreams */);

//Setup Ethernet Client
EthernetClient client;

//Setup Xively client
XivelyClient xivelyclient(client);

/**************************************************************************/
/*
Displays some basic information on this sensor from the unified
sensor API sensor_t type (see Adafruit_Sensor for more information)
*/
/**************************************************************************/
void displaySensorDetails(void)
{
sensor_t sensor;
tsl.getSensor(&amp;sensor);
Serial.println(&quot;————————————&quot;);
Serial.print (&quot;Sensor: &quot;); Serial.println(sensor.name);
Serial.print (&quot;Driver Ver: &quot;); Serial.println(sensor.version);
Serial.print (&quot;Unique ID: &quot;); Serial.println(sensor.sensor_id);
Serial.print (&quot;Max Value: &quot;); Serial.print(sensor.max_value); Serial.println(&quot; lux&quot;);
Serial.print (&quot;Min Value: &quot;); Serial.print(sensor.min_value); Serial.println(&quot; lux&quot;);
Serial.print (&quot;Resolution: &quot;); Serial.print(sensor.resolution); Serial.println(&quot; lux&quot;);
Serial.println(&quot;————————————&quot;);
Serial.println(&quot;&quot;);
delay(500);

}

void displayBMPSensorDetails(void)
{
sensor_t sensor;
bmp.getSensor(&amp;sensor);
Serial.println(&quot;————————————&quot;);
Serial.print (&quot;Sensor: &quot;); Serial.println(sensor.name);
Serial.print (&quot;Driver Ver: &quot;); Serial.println(sensor.version);
Serial.print (&quot;Unique ID: &quot;); Serial.println(sensor.sensor_id);
Serial.print (&quot;Max Value: &quot;); Serial.print(sensor.max_value); Serial.println(&quot; hPa&quot;);
Serial.print (&quot;Min Value: &quot;); Serial.print(sensor.min_value); Serial.println(&quot; hPa&quot;);
Serial.print (&quot;Resolution: &quot;); Serial.print(sensor.resolution); Serial.println(&quot; hPa&quot;);
Serial.println(&quot;————————————&quot;);
Serial.println(&quot;&quot;);
delay(500);
}

/**************************************************************************/
/*
Configures the gain and integration time for the TSL2561
*/
/**************************************************************************/
void configureSensor(void)
{
/* You can also manually set the gain or enable auto-gain support */
// tsl.setGain(TSL2561_GAIN_1X); /* No gain … use in bright light to avoid sensor saturation */
// tsl.setGain(TSL2561_GAIN_16X); /* 16x gain … use in low light to boost sensitivity */
tsl.enableAutoRange(true); /* Auto-gain … switches automatically between 1x and 16x */

/* Changing the integration time gives you better sensor resolution (402ms = 16-bit data) */
tsl.setIntegrationTime(TSL2561_INTEGRATIONTIME_13MS); /* fast but low resolution */
// tsl.setIntegrationTime(TSL2561_INTEGRATIONTIME_101MS); /* medium resolution and speed */
// tsl.setIntegrationTime(TSL2561_INTEGRATIONTIME_402MS); /* 16-bit data but slowest conversions */

/* Update these values depending on what you’ve set above! */
Serial.println(&quot;————————————&quot;);
Serial.print (&quot;Gain: &quot;); Serial.println(&quot;Auto&quot;);
Serial.print (&quot;Timing: &quot;); Serial.println(&quot;13 ms&quot;);
Serial.println(&quot;————————————&quot;);
}

/**************************************************************************/
/*
Arduino setup function (automatically called at startup)
*/
/**************************************************************************/
void setup(void)
{
Serial.begin(9600);
Serial.println(&quot;Light Sensor Test&quot;); Serial.println(&quot;&quot;);
// Setup Ethernet

while (Ethernet.begin(mac) != 1)
{
Serial.println(&quot;Error getting IP address via DHCP, trying again…&quot;);
delay(5000);
}
// print your local IP address:
Serial.print(&quot;My IP address: &quot;);

for (byte thisByte = 0; thisByte &lt; 4; thisByte++) {
// print the value of each byte of the IP address:
Serial.print(Ethernet.localIP()[thisByte], DEC);
Serial.print(&quot;.&quot;);
}

/* Initialise the BMP sensor */
if(!bmp.begin())
{
/* There was a problem detecting the BMP085 … check your connections */
Serial.print(&quot;Ooops, no BMP085 detected … Check your wiring or I2C ADDR!&quot;);
while(1);
}

/* Display some basic information on this sensor */
Serial.println(&quot;Found BMP&quot;);
displayBMPSensorDetails();

/* Initialise the TSL sensor */
if(!tsl.begin())
{
/* There was a problem detecting the ADXL345 … check your connections */
Serial.print(&quot;Ooops, no TSL2561 detected … Check your wiring or I2C ADDR!&quot;);
while(1);
}

/* Display some basic information on this sensor */

displaySensorDetails();

/* Setup the sensor gain and integration time */
//configureSensor();

//Setup Thingspeak client
ThingSpeak.begin(client);

/* We’re ready to go! */
Serial.println(&quot;&quot;);
}

/**************************************************************************/
/*
Arduino loop function, called once ‘setup’ is complete (your own code
should go here)
*/
/**************************************************************************/
void loop(void)
{
/* Get a new sensor event */
sensors_event_t event;
sensors_event_t tslevent;
tsl.getEvent(&amp;tslevent);

bmp.getEvent(&amp;event);

/* Display the results (light is measured in lux) */
if (tslevent.light)
{
Serial.print(tslevent.light); Serial.println(&quot; lux&quot;);
//Add Light reading to Xively datastream and ThingSpeak
datastreams[1].setFloat(tslevent.light);
ThingSpeak.setField(3,tslevent.light);
}
else
{
/* If event.light = 0 lux the sensor is probably saturated
and no reliable data could be generated! */
Serial.println(&quot;Sensor overload&quot;);
}

/* Display the results (barometric pressure is measure in hPa) */

if (event.pressure)
{
/* Display atmospheric pressue in hPa */
Serial.print(&quot;Pressure: &quot;);
Serial.print(event.pressure);
Serial.println(&quot; hPa&quot;);

/Add Event Pressure to Xively datastream and ThingSpeak

datastreams[2].setFloat(event.pressure);
ThingSpeak.setField(1,event.pressure);
/* Calculating altitude with reasonable accuracy requires pressure *
* sea level pressure for your position at the moment the data is *
* converted, as well as the ambient temperature in degress *
* celcius. If you don’t have these values, a ‘generic’ value of *
* 1013.25 hPa can be used (defined as SENSORS_PRESSURE_SEALEVELHPA *
* in sensors.h), but this isn’t ideal and will give variable *
* results from one day to the next. *
* *
* You can usually find the current SLP value by looking at weather *
* websites or from environmental information centers near any major *
* airport. *
* *
* For example, for Paris, France you can check the current mean *
* pressure and sea level at: http://bit.ly/16Au8ol */

/* First we get the current temperature from the BMP085 */
float temperature;
bmp.getTemperature(&amp;temperature);

datastreams[0].setFloat(temperature);
ThingSpeak.setField(2,temperature);

Serial.print(&quot;Temperature: &quot;);
Serial.print(temperature);
Serial.println(&quot; C&quot;);

/* Then convert the atmospheric pressure, SLP and temp to altitude */
/* Update this next line with the current SLP for better results */
float seaLevelPressure = SENSORS_PRESSURE_SEALEVELHPA;
Serial.print(&quot;Altitude: &quot;);
Serial.print(bmp.pressureToAltitude(seaLevelPressure,
event.pressure,
temperature));
Serial.println(&quot; m&quot;);
Serial.println(&quot;&quot;);
}
else
{
Serial.println(&quot;Sensor error&quot;);
}

//Read anemometer
sensorValue = analogRead(sensorPin);
sensorVoltage = sensorValue * voltageConversionConstant; //Convert sensor value to actual voltage
Serial.print(&quot;Sensor Value: &quot;);
Serial.println(sensorValue);

//Convert voltage value to wind speed using range of max and min voltages and wind speed for the anemometer
if (sensorVoltage &lt;= voltageMin){
windSpeed = 0; //Check if voltage is below minimum value. If so, set wind speed to zero.
//Write to Xively and ThingSpeak
datastreams[3].setFloat(windSpeed);
ThingSpeak.setField(4,windSpeed);
}else {
//Write to Xively and ThingSpeak
windSpeed = (sensorVoltage – voltageMin)*windSpeedMax/(voltageMax – voltageMin); //For voltages above minimum value, use the linear relationship to calculate wind speed.
datastreams[3].setFloat(windSpeed);
ThingSpeak.setField(4,windSpeed);
}

//Add all streams to Xively
Serial.println(&quot;Uploading it to Xively&quot;);

Serial.println(xivelyKey);
Serial.println(feed);
int ret = xivelyclient.put(feed, xivelyKey);

Serial.print(&quot;xivelyclient.put returned &quot;);
Serial.println(ret);

// Update Thingspeak
// Write the fields that you’ve set all at once.
ThingSpeak.writeFields(myChannelNumber, myWriteAPIKey);

//Print voltage and windspeed to serial
Serial.print(&quot;Voltage: &quot;);
Serial.print(sensorVoltage);
Serial.print(&quot;\t&quot;);
Serial.print(&quot;Wind speed: &quot;);
Serial.println(windSpeed);
delay(3000);
}

[/pre]

Weather Station with Anemometer

I have been chipping away at building an Arduino based Weather Station.  Upgraded to a Arduino Mega as I was running out of memory on the Uno with all the libraries and sensors I was using.

Have code reading the Anemometer/BMP180/TSL2561 at this point. (more code sharing in upcoming post).

Using basic Ethernet Shield at the moment for proof of concept.  Will eventually go wireless.

Also have code writing to an Xively feed at: Weather Station

Will more than likely play with other sites like Thingspeak and or more Plot.ly.

image

image

image